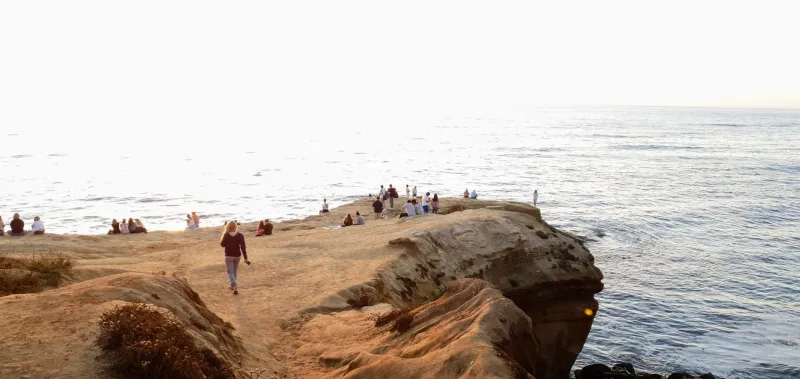
Light, Lens, and Lava Rock: The Serious Photographer's Guide to Shooting Sunset Cliffs
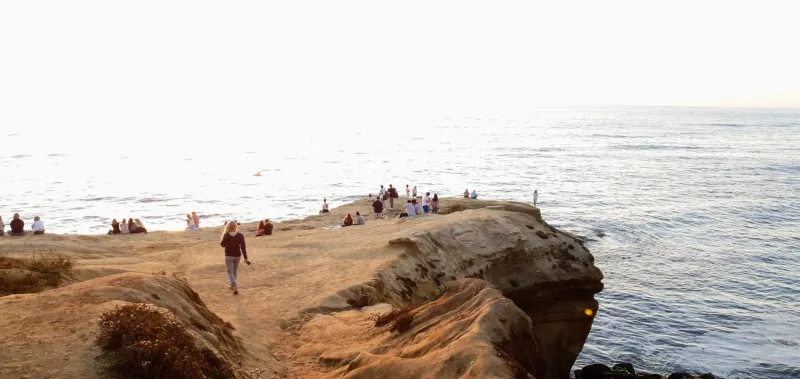
There's a reason photographers — both hobbyists and professionals — keep coming back to Sunset Cliffs Natural Park. The combination of jagged volcanic rock, crashing Pacific surf, and that famous Southern California sky creates a scene that practically begs to be photographed. But showing up with a camera (or even just your iPhone) and hoping for the best usually produces mediocre results.
The good news? A little preparation goes a long way here. Whether you're shooting with a mirrorless full-frame or your latest smartphone, this guide will help you walk away with images that actually do justice to one of San Diego's most stunning natural landmarks.
Timing Is Everything: When to Show Up
Golden hour at Sunset Cliffs is exactly what it sounds like — magical. But the specific timing shifts throughout the year, and showing up even 20 minutes late can mean you've missed the best light entirely.
During summer months (June through August), sunset typically falls between 7:45 and 8:00 p.m. In winter, you're looking at closer to 4:45 to 5:15 p.m. Use a free app like PhotoPills or The Photographer's Ephemeris to pin down the exact time for the day you're visiting. Aim to arrive at least 45 minutes before sunset — you'll want time to scout your spot and get settled before the light starts doing its thing.
Don't overlook blue hour either. The 20 to 30 minutes after the sun dips below the horizon often produces softer, more dramatic colors than golden hour itself. Stick around.
Seasonal Considerations: What to Expect Month by Month
San Diego's weather is famously mild, but coastal conditions vary more than people expect.
Spring (March–May): Known locally as "June Gloom" season — though it starts earlier than the name suggests. Morning and evening marine layer can actually work in your favor, diffusing light and creating moody, atmospheric shots. Just don't count on a clear sky.
Summer (June–August): Longer days and warmer temperatures bring bigger crowds, but also more reliable clear skies. The sun sets further north along the horizon, which changes the angle of light hitting the cliffs.
Fall (September–November): Arguably the best season for photography here. The marine layer clears out, crowds thin, and the sunsets tend to be vivid and consistent. This is when you'll see those fire-orange skies that make Sunset Cliffs famous.
Winter (December–February): Dramatic storm light and high surf make winter shots some of the most striking you'll find. Earlier sunsets mean you don't have to stay out late, but dress in layers — it gets cold fast once the sun goes down.
Camera Settings for Beginners and Enthusiasts
If you're shooting with a dedicated camera, here's a solid starting point for golden hour at Sunset Cliffs:
- Aperture: f/8 to f/11 for sharp foreground rock detail and a focused background
- ISO: Start at 100 and bump up only as the light fades — ISO 400 to 800 is usually fine for blue hour
- Shutter speed: This depends on what you're going for. A faster shutter (1/500 or above) freezes crashing waves into dramatic splashes. A slower shutter (1/4 to 2 seconds) turns the water silky and smooth — you'll need a tripod for this
- White balance: Try "Cloudy" or "Shade" settings to warm up the image naturally, rather than relying on auto
Smartphone shooters: Don't underestimate your phone's camera. Tap to focus on the horizon, use Portrait or Pro mode if available, and avoid digital zoom — move your feet instead. A small clip-on tripod adapter can make a real difference for long-exposure shots.
Best Vantage Points Along the Cliffs
Not all spots along Sunset Cliffs are created equal, and the right location depends on your skill level and what kind of shot you're after.
The Main Overlook (Near Ladera Street): The classic spot, and for good reason. Wide, unobstructed views of the Pacific with clean horizon lines. Great for beginners and anyone who wants a reliable composition without scrambling around on rocks.
The Tide Pools and Lower Rock Shelves: For more adventurous photographers, carefully climbing down to the lower rock shelves (during low tide only — check tide charts at tidesandcurrents.noaa.gov) puts you right in the action. The textured volcanic rock makes for incredible foreground interest, and you can frame waves crashing through natural arches and blowholes.
Sunset Cliffs Boulevard Pullouts (South Section): The southern stretch of the park toward Osprey Street has several informal pullouts that offer a slightly different angle on the cliffs — less trafficked and often more intimate in feel.
Cabrillo National Monument (Nearby): Technically a separate location, but worth mentioning. The tidepools and overlooks at Cabrillo offer a different perspective on the same coastline, and the crowds are usually more manageable.
Composition Techniques Worth Trying
Once you've found your spot and dialed in your settings, think about what makes a photograph interesting rather than just pretty.
Use the rule of thirds: Place the horizon on either the upper or lower third of your frame — not dead center. Putting it low emphasizes dramatic sky; placing it high brings out the texture and color of the cliffs and water.
Find a foreground anchor: A tide pool, a patch of sea foam, or a particularly interesting rock formation gives the viewer's eye a place to enter the image before traveling to the horizon.
Look for leading lines: Cracks in the rock, the edge of a cliff, or even the curve of the coastline can draw the eye naturally through the frame.
Shoot vertical: Instagram and portrait-format prints aside, vertical compositions often work beautifully at coastal locations — especially when you want to show the height and drama of the cliffs against a tall sky.
Practical Tips Before You Go
A few things to keep in mind that'll make your shoot smoother:
- Parking: Street parking along Sunset Cliffs Boulevard fills up fast around golden hour, especially on weekends. Arrive early or walk in from a nearby neighborhood like Ocean Beach.
- Safety: The cliffs are real, the drops are serious, and the surf is unpredictable. Stay behind barriers, watch for rogue waves if you're near the water's edge, and never turn your back on the ocean.
- Lens cleaning: Salt spray is everywhere. Bring a microfiber cloth and lens cleaning solution — you'll need them.
- Respect the space: This is a natural park. Stay on designated paths when possible, and don't disturb the tide pool ecosystems for the sake of a shot.
Sunset Cliffs rewards patience and preparation more than almost any other spot in San Diego. Get there early, stay late, and don't be afraid to experiment. The light here has a way of surprising you.