After Dark at the Cliffs: Your Complete Guide to Night Photography and Nocturnal Wonders
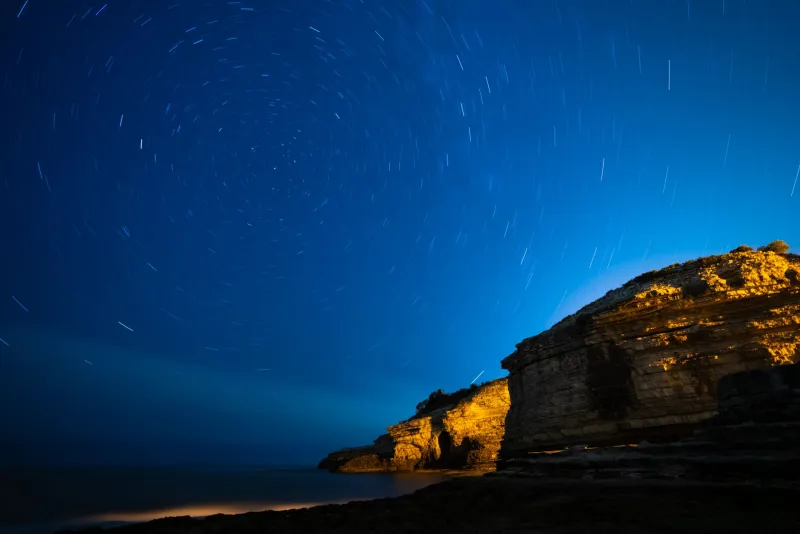
Everybody knows Sunset Cliffs is gorgeous at golden hour. That's not exactly breaking news. But here's what the crowds who pack up their gear and head to Ocean Beach for tacos don't realize: the moment the last orange glow fades from the sky, an entirely different landscape takes its place. The lava rock turns silver. The tide pools catch starlight. And on the right nights, the waves themselves can glow.
Night photography at Sunset Cliffs isn't just possible — it's genuinely spectacular. It does require some planning, a little patience, and a willingness to stand on a dark bluff at midnight. But if you're up for it, you'll come home with images that look absolutely nothing like every other Sunset Cliffs photo on Instagram.
Why Nighttime Changes Everything
During the day, Sunset Cliffs is defined by contrast — the deep blue of the Pacific, the warm ochre of the cliffs, the white churn of the surf. At night, all of that dissolves into something quieter and stranger. The horizon line blurs. Long exposures smooth the ocean into silk. The jagged rock formations that look dramatic in daylight become almost sculptural against a star-filled sky.
There's also a lot less competition for your composition. The overlooks along Sunset Cliffs Boulevard that are shoulder-to-shoulder at 7 p.m. are often completely empty by 10. That means you can set up your tripod wherever you want, take your time, and actually think about what you're shooting.
Planning Around the Moon
The single most important variable in night photography at Sunset Cliffs is the moon, and understanding it will make or break your shoot.
Full moon nights are ideal for landscape shots. The moon rises over the eastern hills and, as it climbs, casts enough light to illuminate the cliffs and sea stacks without washing out the sky entirely. You can shoot at lower ISOs, keep noise manageable, and still get that dreamy blue-silver glow across the water. A full moon rising over the Pacific from the southern end of the park, framed between two rock formations, is the kind of shot that makes people stop scrolling.
New moon nights flip the script entirely. With zero lunar interference, the Milky Way becomes visible — and yes, you can actually see it from Sunset Cliffs on clear nights, especially if you position yourself away from the brightest glow of downtown San Diego to the north. New moon windows are your best bet for star trails and astrophotography.
Crescent and quarter moon phases offer a middle ground — enough ambient light to define the landscape, not so much that it obliterates the stars. These are great nights for experimenting.
A free app like PhotoPills or The Photographer's Ephemeris will show you exactly where and when the moon rises and sets, its angle over the water, and how much illumination to expect. Download one before you go. It's genuinely essential.
Light Pollution: The Honest Assessment
Let's be real — Sunset Cliffs is inside a major US city. San Diego's light dome is visible, and it affects your sky shots. The northern horizon (toward downtown and Mission Hills) will always show some orange glow. The western and southern horizons, however, are open ocean, and that's where your sky will be darkest and clearest.
For the best results, orient your compositions toward the southwest or directly west. The Milky Way core is visible from roughly February through October in the northern hemisphere, and during those months it arcs in a direction that works reasonably well from the cliffs. You won't get the pitch-black skies of Joshua Tree or Anza-Borrego, but you'll get something genuinely beautiful — and you'll have the ocean in the foreground, which desert parks can't offer.
Smog and marine layer are also factors. Check the air quality index and marine layer forecasts before you commit to a shoot night. Clear winter nights after a Santa Ana wind event are often the sharpest and most transparent you'll find.
Camera Settings to Start With
If you're new to night photography, these are solid starting points. Adjust from there based on your specific conditions.
For star and Milky Way shots (new moon):
- ISO: 1600–3200
- Aperture: f/2.8 or as wide as your lens allows
- Shutter speed: 15–25 seconds (use the "500 rule" — divide 500 by your focal length to avoid star trails)
- White balance: 3800–4200K for a natural, slightly cool sky tone
For star trails (longer exposures):
- ISO: 400–800
- Aperture: f/4–f/5.6
- Shutter speed: 30 minutes to several hours, or stack multiple shorter exposures in post
- Use an intervalometer so you're not holding the shutter open manually
For full moon landscape shots:
- ISO: 200–800 depending on moon brightness
- Aperture: f/8–f/11 for sharpness across the scene
- Shutter speed: 10–60 seconds — experiment based on how much light the moon is throwing
- A two-shot blend (one exposed for the moon, one for the foreground) can help if the moon itself is blowing out
A sturdy tripod is non-negotiable. The cliffs can be windy at night, and any movement during a long exposure will ruin the shot. Bring a remote shutter release or use your camera's built-in timer to avoid camera shake when you press the shutter.
Bioluminescence: The Unpredictable Magic
A few times each year — usually during warm water periods in late summer and fall — the waters off Sunset Cliffs light up with bioluminescent algae. When waves break and disturb the water, the dinoflagellates in it emit a brilliant electric blue glow. It's one of the most surreal natural phenomena you can witness in Southern California, and Sunset Cliffs is one of the best places in San Diego to see it.
Bioluminescence isn't predictable on a calendar. It tends to follow red tide events (when the algae concentration is high enough to tint the water brownish-red during the day). Check local ocean conditions and San Diego surf reports, and follow Scripps Institution of Oceanography's social channels — they often post alerts when conditions are right.
For photography, shoot on a new moon night for maximum contrast. Use a high ISO (3200–6400), a wide aperture, and a shutter speed of 10–20 seconds. The glow is real but subtle — your camera will capture it better than your eyes in many cases. Position yourself at a lower vantage point near the water's edge (safely — always check wave conditions first) to frame the glowing surf against the dark cliffs.
Best Spots After Dark
Not every overlook is equally suited for night shooting. Here are a few that work especially well:
- The main overlook near Ladera Street gives you a wide, open view of the horizon — great for moon rises and long-exposure ocean shots.
- The sea cave area near the southern end of the park offers interesting foreground elements with the rock formations and channels. The tide pools here catch reflected light beautifully.
- The open bluff stretch between Adair Street and Osprey Street is one of the less-trafficked sections and gives you a clean southern horizon.
Always scout your locations during daylight before attempting to shoot them at night. Knowing where the uneven ground is, where the cliff edges are, and how to navigate the path back to your car in the dark is basic safety — and it'll make your shoot a lot more relaxed.
A Few Practical Notes
Bring layers. San Diego nights are cooler than most visitors expect, especially near the water, and standing still for hours while your camera does the work will chill you down fast. A headlamp with a red-light mode is essential — it lets you see what you're doing without ruining your night vision or bothering other photographers nearby. And let someone know where you're going. The cliffs are safe and well-used, but it's always smart to have a check-in plan when you're out solo after dark.
The version of Sunset Cliffs that most people never see is waiting for you after the last car pulls out of the lot. It's quieter, stranger, and honestly more photogenic than you'd expect. All it takes is a willingness to stay a little later than everyone else.